
How To Start Website Testing
For some, ultimatums set a flame under their rump and motivate them in the moment, but is it a sustainable, healthy way to drive people to change?
“Marry me or I’m leaving you.”
Or is it really just a last-resort tactic for desperate times?
“Do or die.”
We often hear this ultimatum in the software testing world when it comes to automating manual tests:
“Start coding or get left behind.”
Though we understand the intent behind it, forcing an entire industry to evolve on the fly isn’t the only thing we can do to improve automated testing, especially if we'd just be waiting for skill to organically catch up with demand.
In 2018, we have software tools aimed at creating practical solutions to everyday development problems, such as overcoming the high learning curve of automating test scripting. mabl allows everyone, developers and testers alike, to create automated, reliable, repeatable website tests in seconds.
In an earlier post, we showed you how you can create automated smoke tests without a line of code with mabl. Now we’ll show you the next step - creating custom test flows for critical user Journeys.
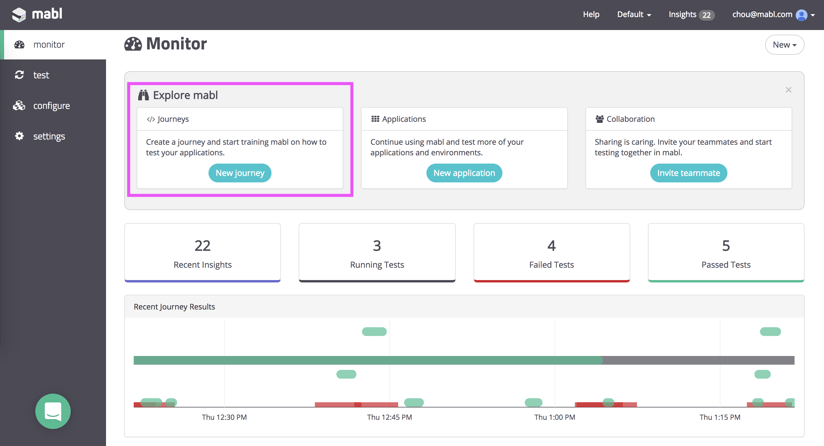 In the mabl dashboard, we have the options to create a new Journey, create a new application, or invite teammates to our Workspace. We’ll create a new Journey:
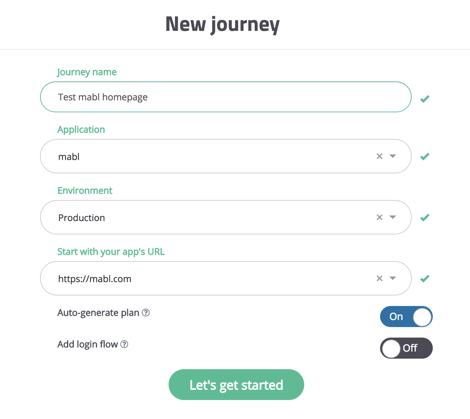
In this case we’ll use the mabl marketing website as our application:
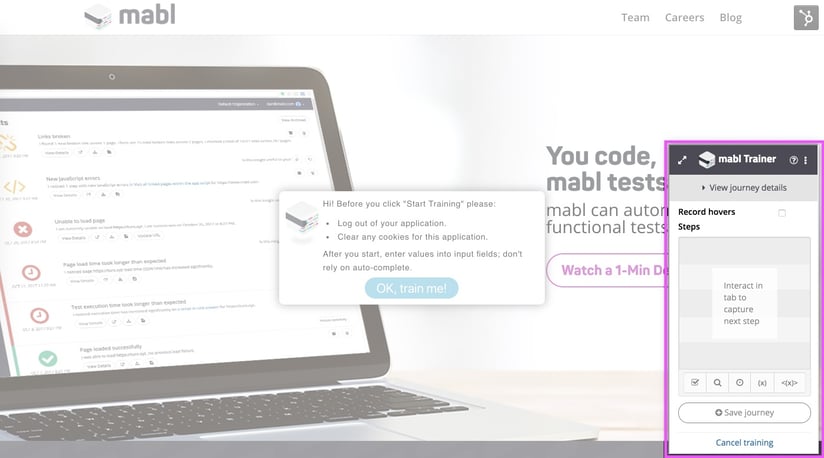
Immediately, mabl takes us to our application URL. mabl gives us some tips on how to get the cleanest recordings possible, such as logging out of your app and clearing your cookies. On the right, you can see the mabl trainer, which is a Chrome extension that installs in seconds. Currently, we support Chrome, with more browser support to come.
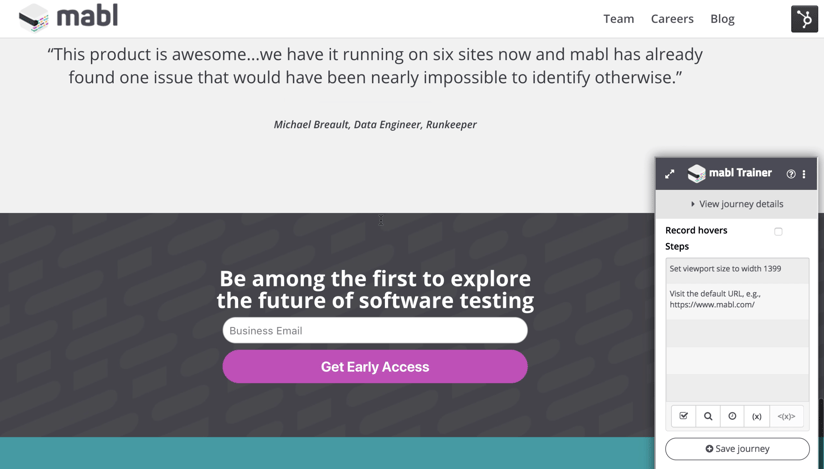
Let’s create our first custom Journey that tests the Early Access email form on the website:
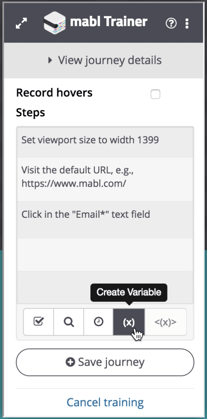
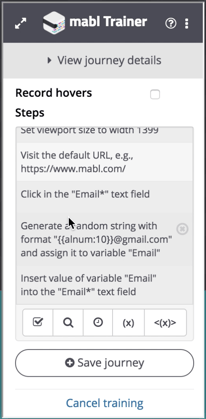
mabl will begin to record every interaction with your app. Clicks are recorded by default, and hovers and JavaScript animations can be too if enabled. The mabl trainer also allows us to add assertions, create randomly generated variables to insert into forms, find elements by CSS or XPath selectors, and add waits if you have long running processes.
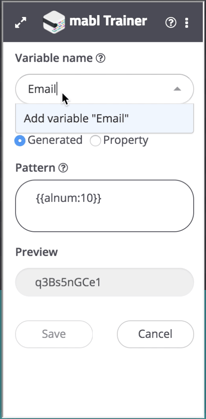
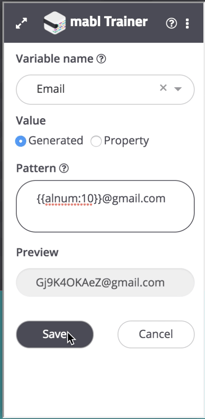
I want to make sure that the email address form validation is working, so I’ll create a randomly generated variable called Email and insert it into the email address form. In the images below, you can see all the steps leading up to the email form, and our newly created email variable being inserted into the form.
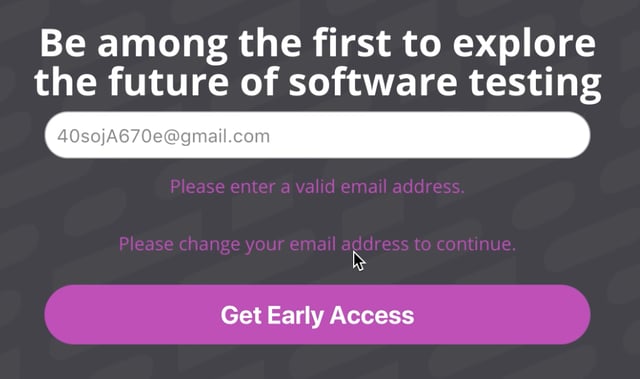
Our Email variable is now in the form, and with a randomly generated string as my email address, I should expect to receive a notification label that lets me know my email address is invalid upon form submission:
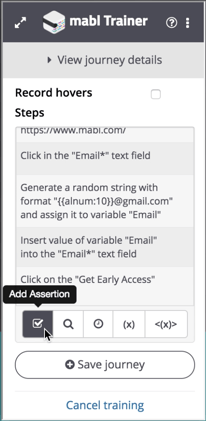
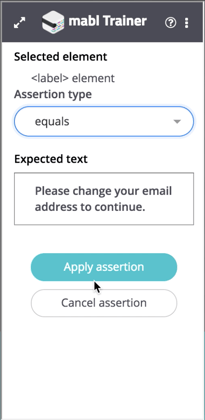
Let’s add a check for this notification label using the Add Assertion feature in the mabl trainer. The trainer supports many types of asserts. In this case, I’ll apply an equals assertion to check that the notification label equals “Please change your email address to continue.”:
We’ll save this Journey and mabl will automatically create a Plan for the Journey, which dictates the schedule on which Journey will be executed. The default Plan runs the Journey every 30 minutes:

And just like that, we have our first
codeless, automated, website testing script under our belts!

Let’s create another simple Journey that checks to make sure the mabl blog is loading properly. This is a good chance for us to use the Find Elements feature in the mabl trainer; since new blog posts are published all the time, searching by CSS property instead of by a dynamic post title would be much more effective than a flaky test.
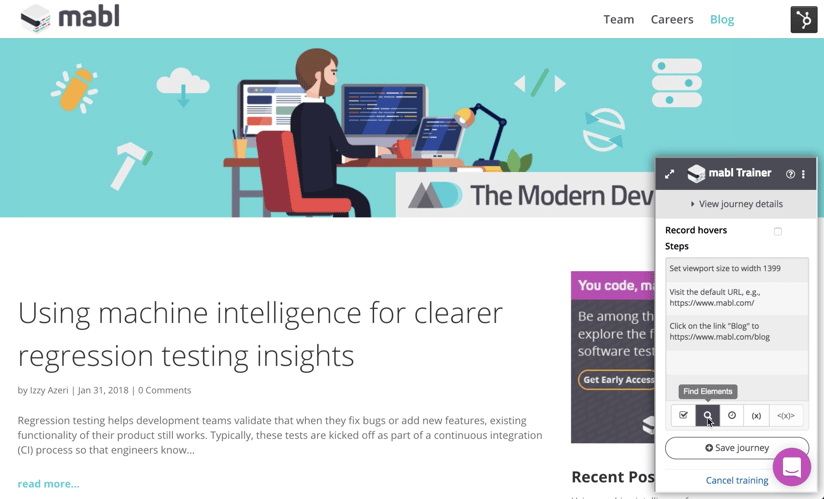
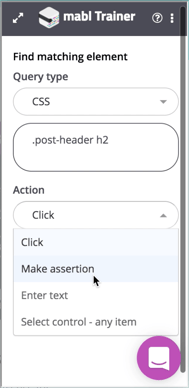
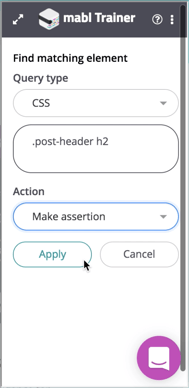
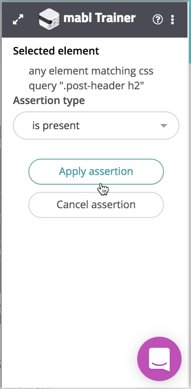
We’ll navigate to the blog through our website and find a CSS element called .post-header h2. Once that CSS element is found, I’ll apply an assertion that it is present:

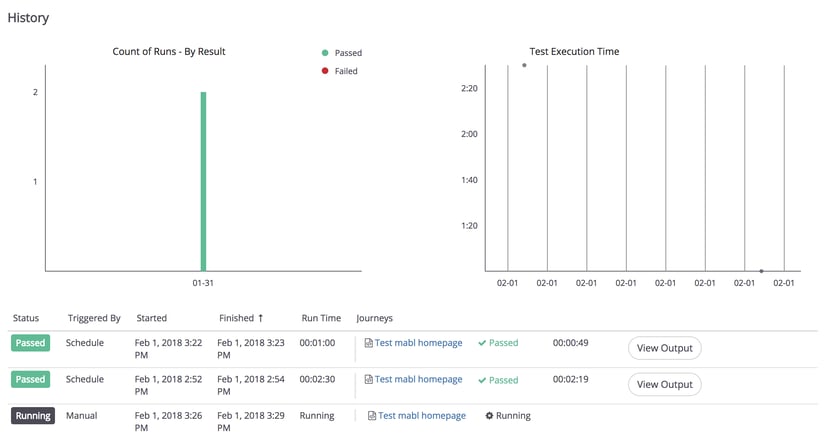
I’ll save this Journey and a default Plan is again created to run the Journey every 30 minutes. Let's go into the Test Execution History dashboard for our Email Address Form Validation test. We see that it already completed twice by the time I finished writing this blog:
It only took me a couple minutes to create these tests, and now they'll run on a regular interval in the background. I can configure mabl to notify me of issues via Slack, so I don't have to hang out in the mabl app waiting for the runs to finish.
So now you know how mabl automatically writes automated tests for you, runs them, and infers actionable insights for you when something goes wrong, such as regressions in performance, newly broken links/JavaScript, and more. With mabl, everyone has the ability and time to maintain automated tests for their website apps. You can try it free for 21 days - just sign up for an account:
![]()


