Even if you're good at multi-tasking and ambidextrous, you can still only do so much. While a computer is a huge step up from the old days of writing on stone tablets, it still can only run as many tasks as the number of threads it has.
But the cloud has no such limitation. While it is still someone else's computer, the cloud can scale infinitely according to your needs. At mabl, our mission is to make QA ops-less and hassle-free while being able to scale to meet the highest software delivery demands today.
That's why we want to show you three ways to easily scale your tests to infinity and beyond using mabl: using Plans, using Reusable Flows and using Data-Driven Testing tables.
How To Start Scaling Your Tests
Plans and Journeys Basics
Plans and journeys are mabl-speak for test plans and test scripts. Test creation with mabl is completely script-less - we believe that test automation should focus more on the end-user journey rather than the test script creation process. That's why we call mabl tests, journeys.
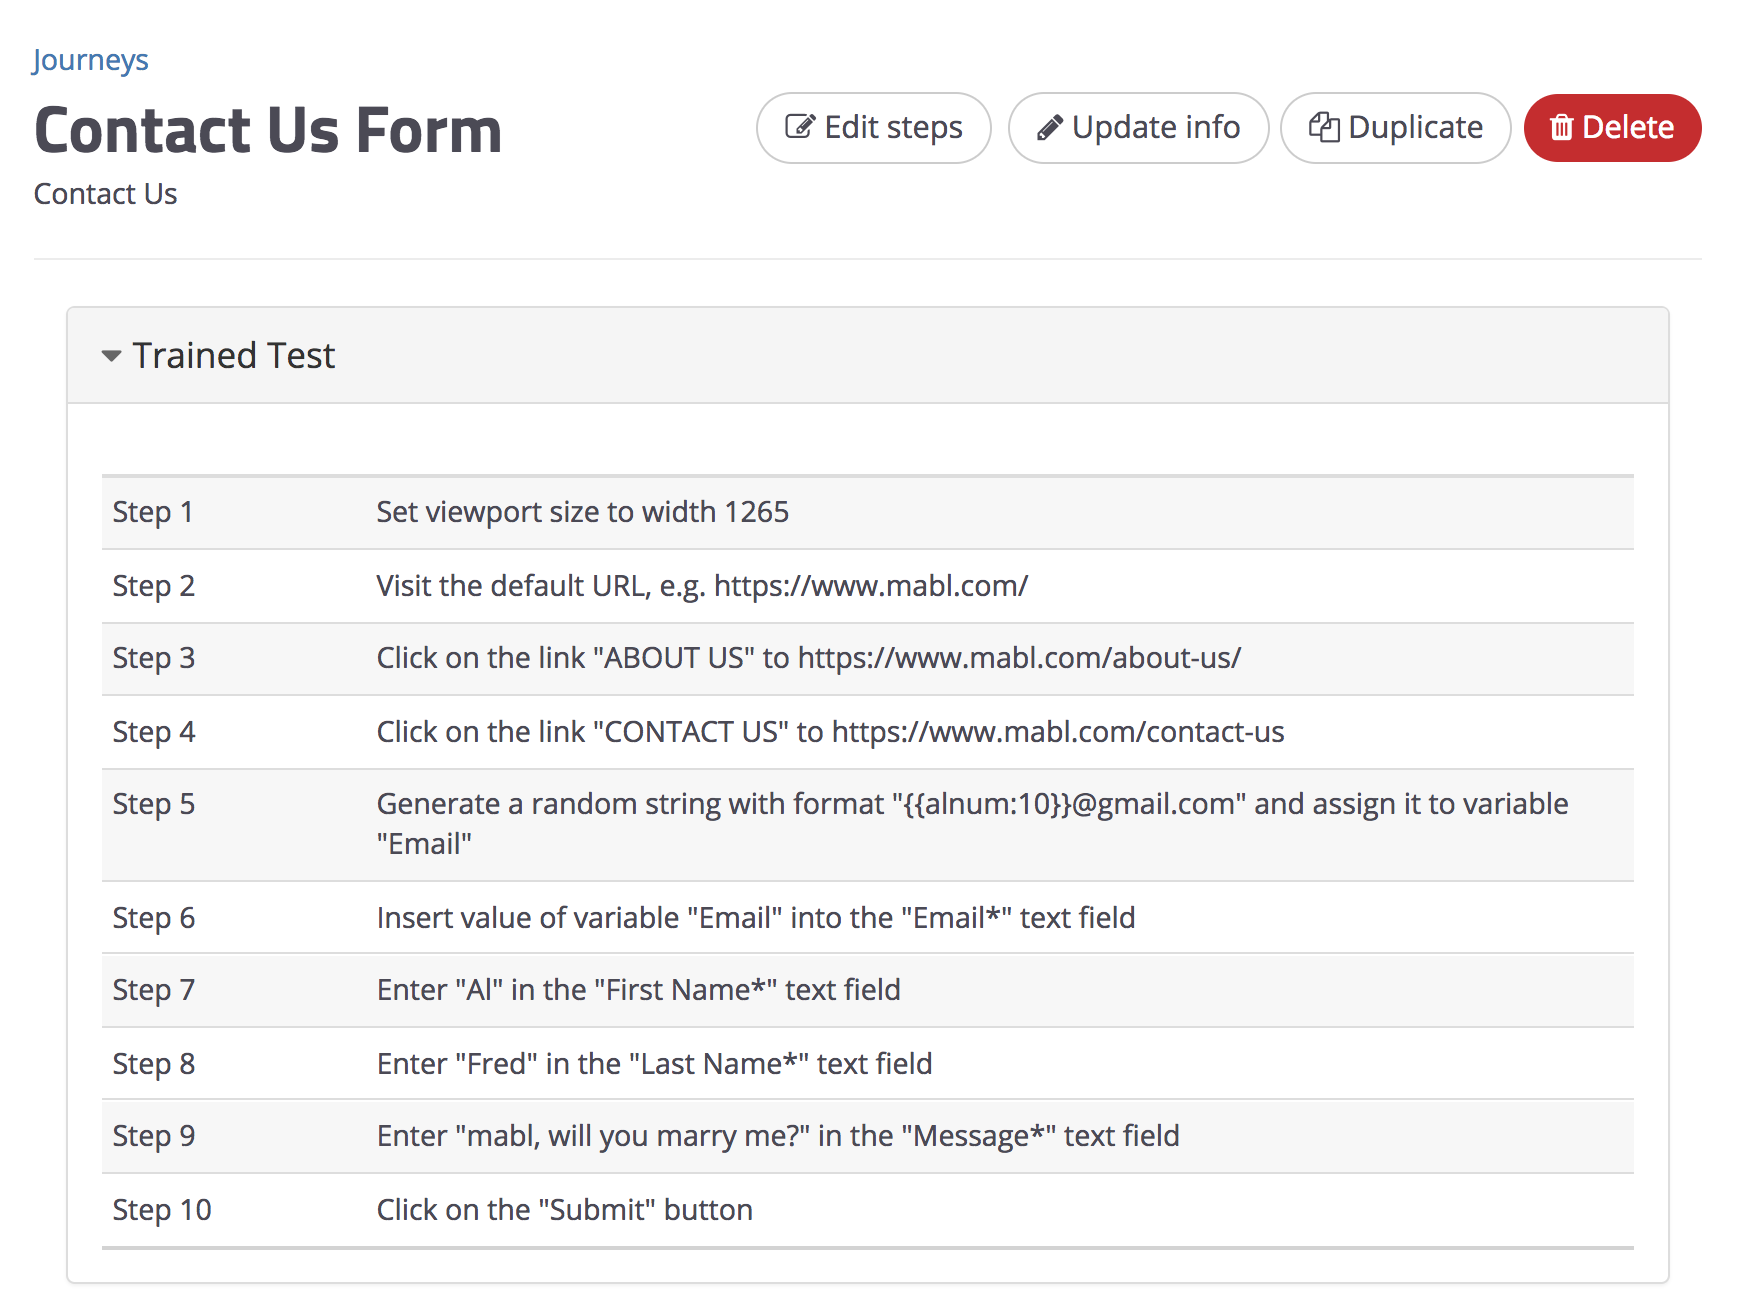
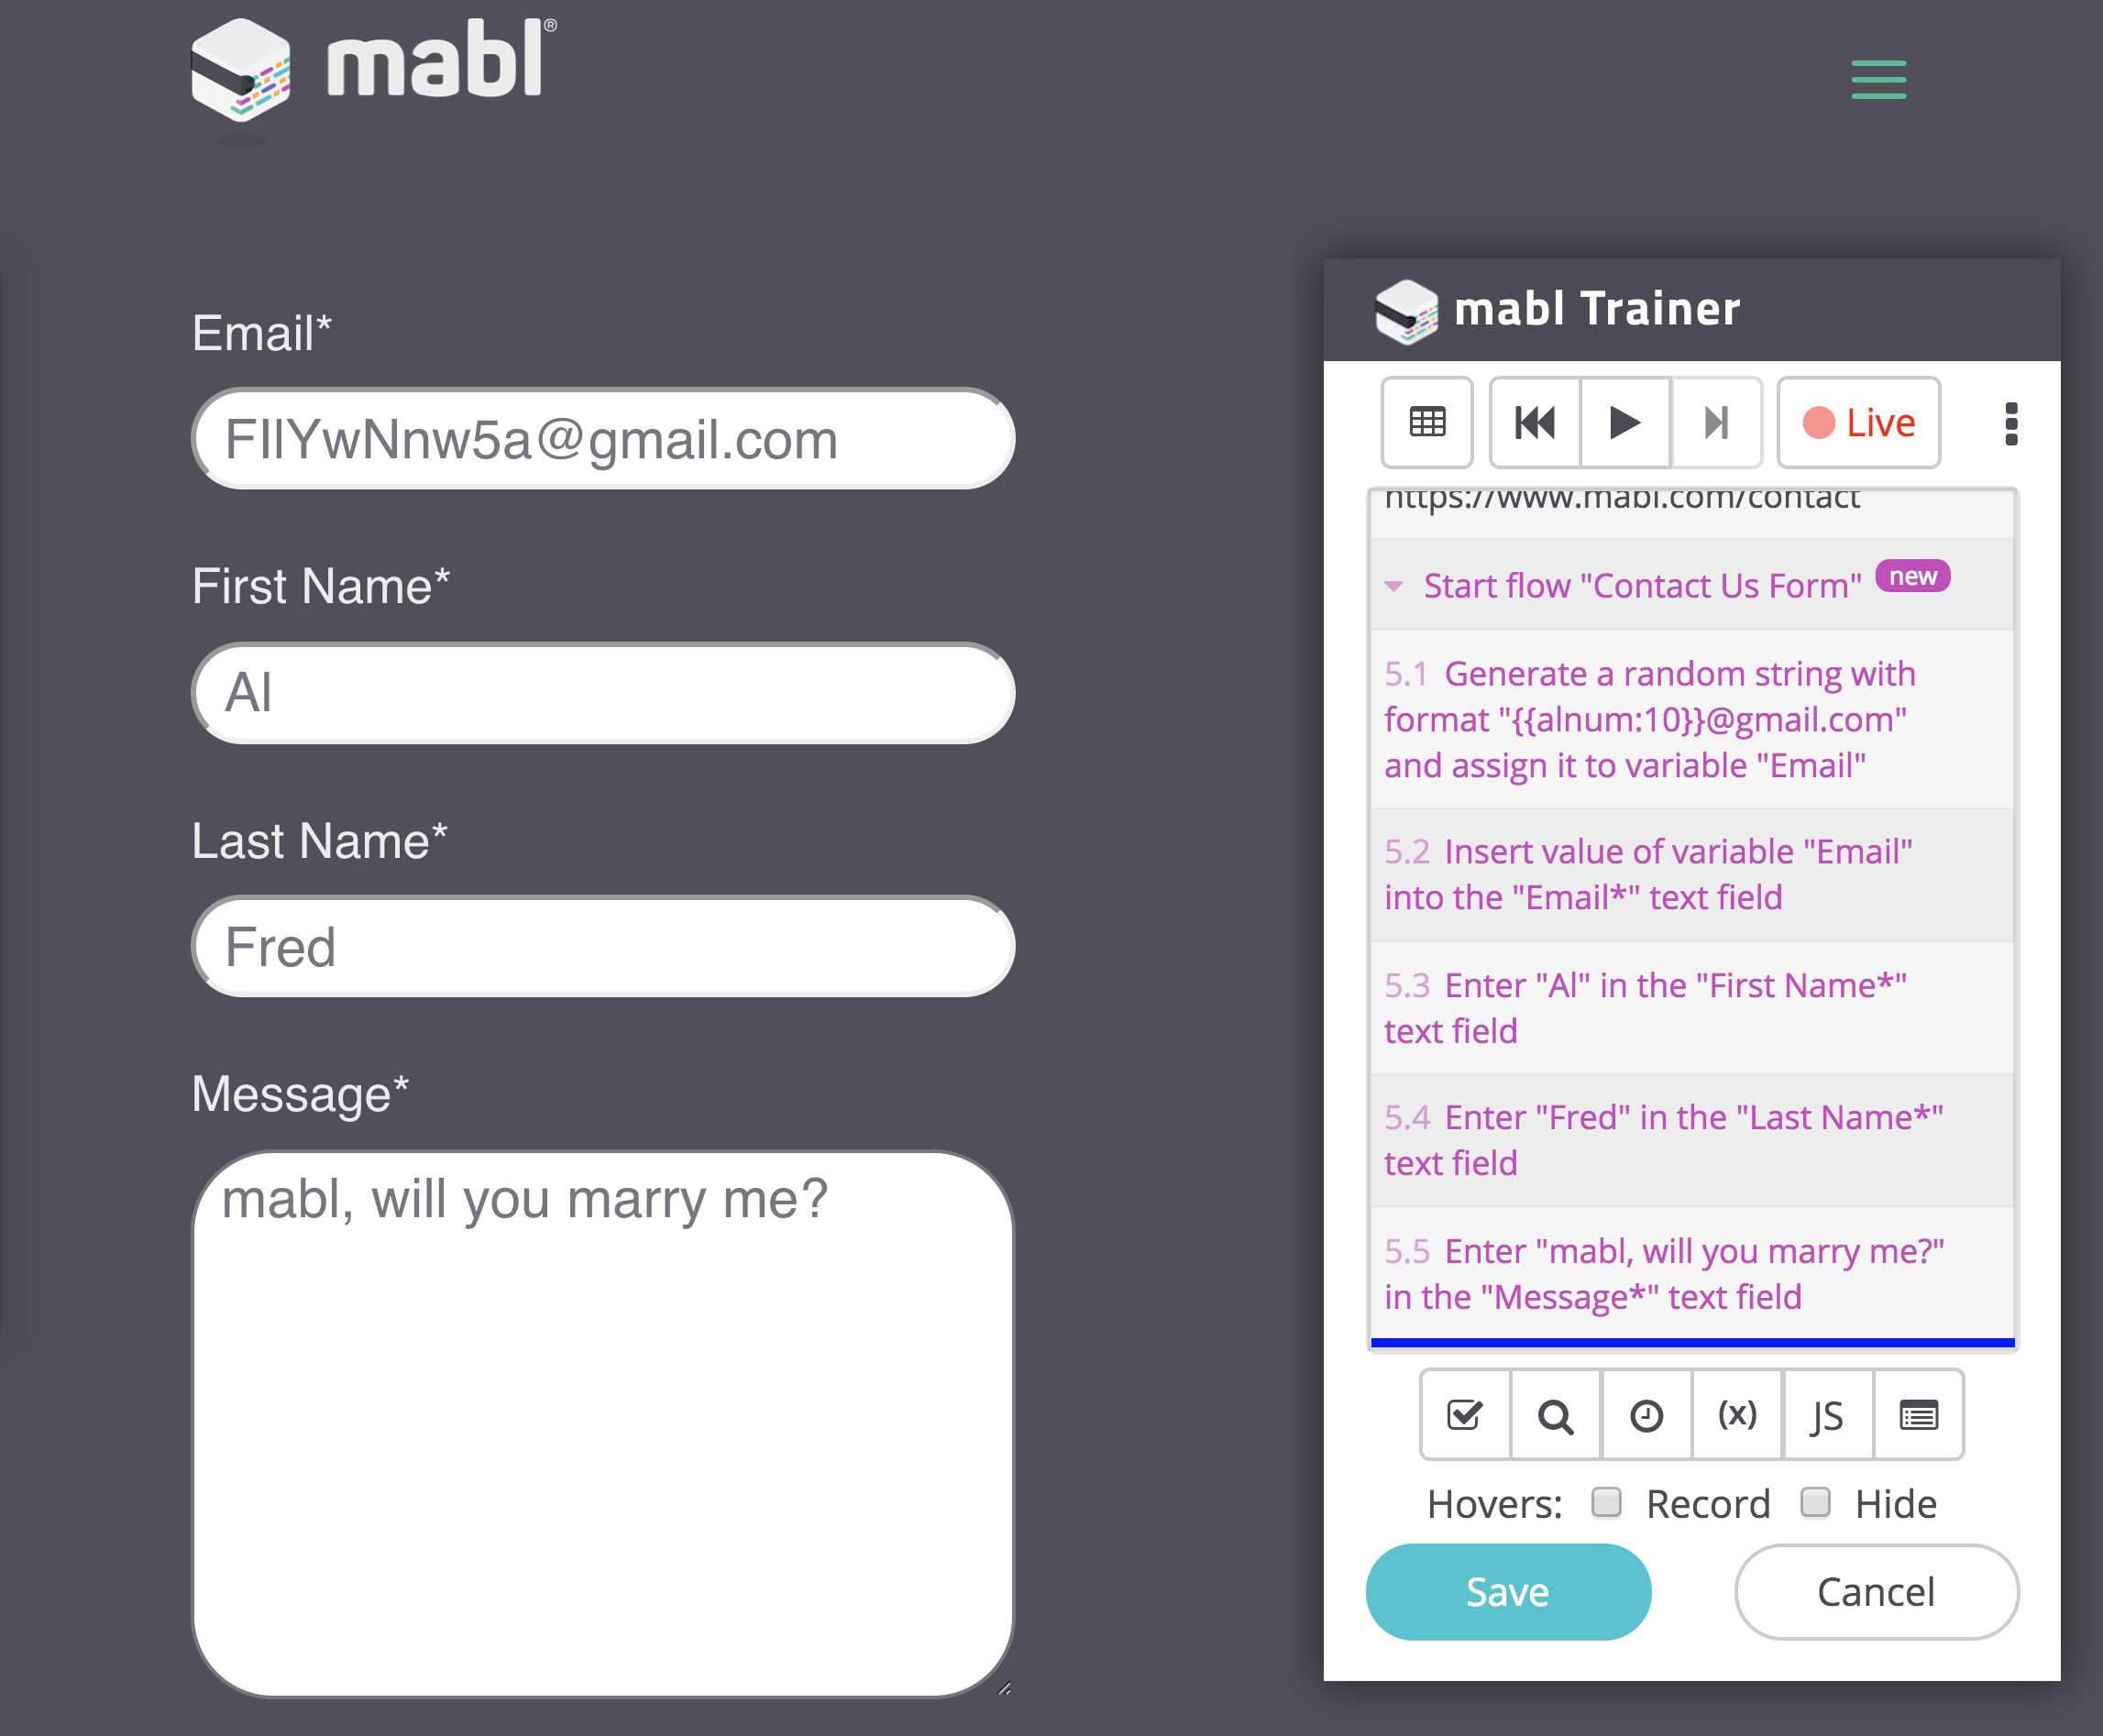
A journey defines each step of a user flow in your application, such as a shopping cart user flow on a retail site. Below is an example journey which navigates to a mabl Contact Us form and fills it out:
Journeys are independent from any environment definitions, such as target URL, browsers, screen-size, execution schedule, etc.
Plans package all the environmental information mentioned above, so that any number of journeys can be run against any combination of environments. This gives you the flexibility to run the same journeys on the same target application across different environments, such as Staging and Production, without having to recreate the journey from scratch.
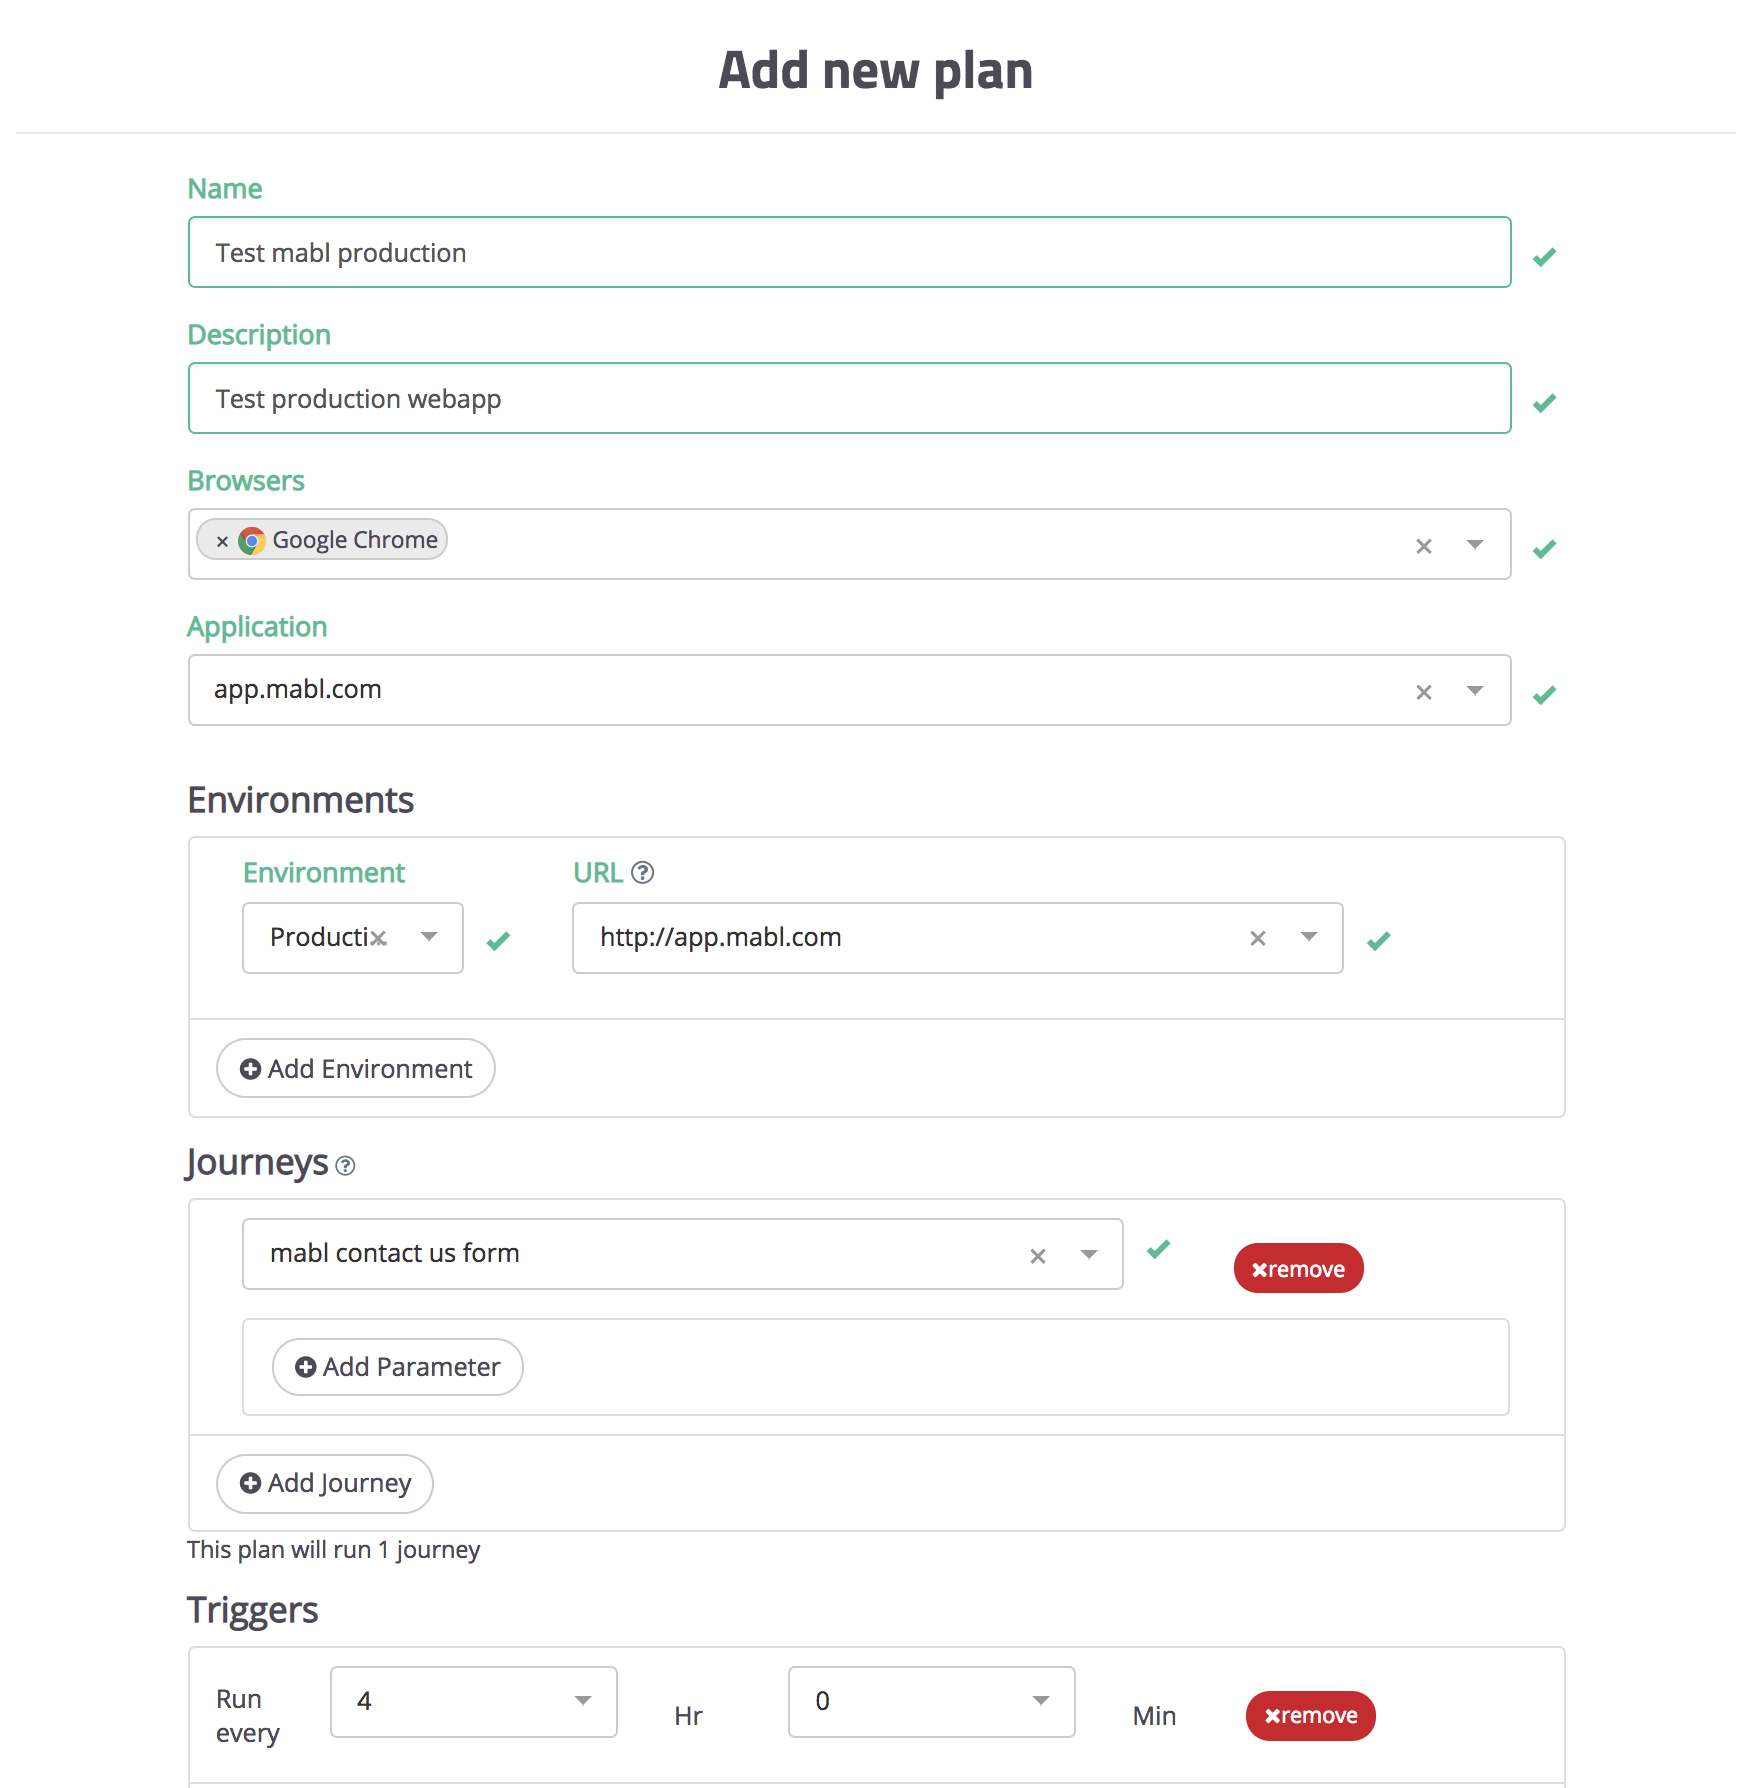
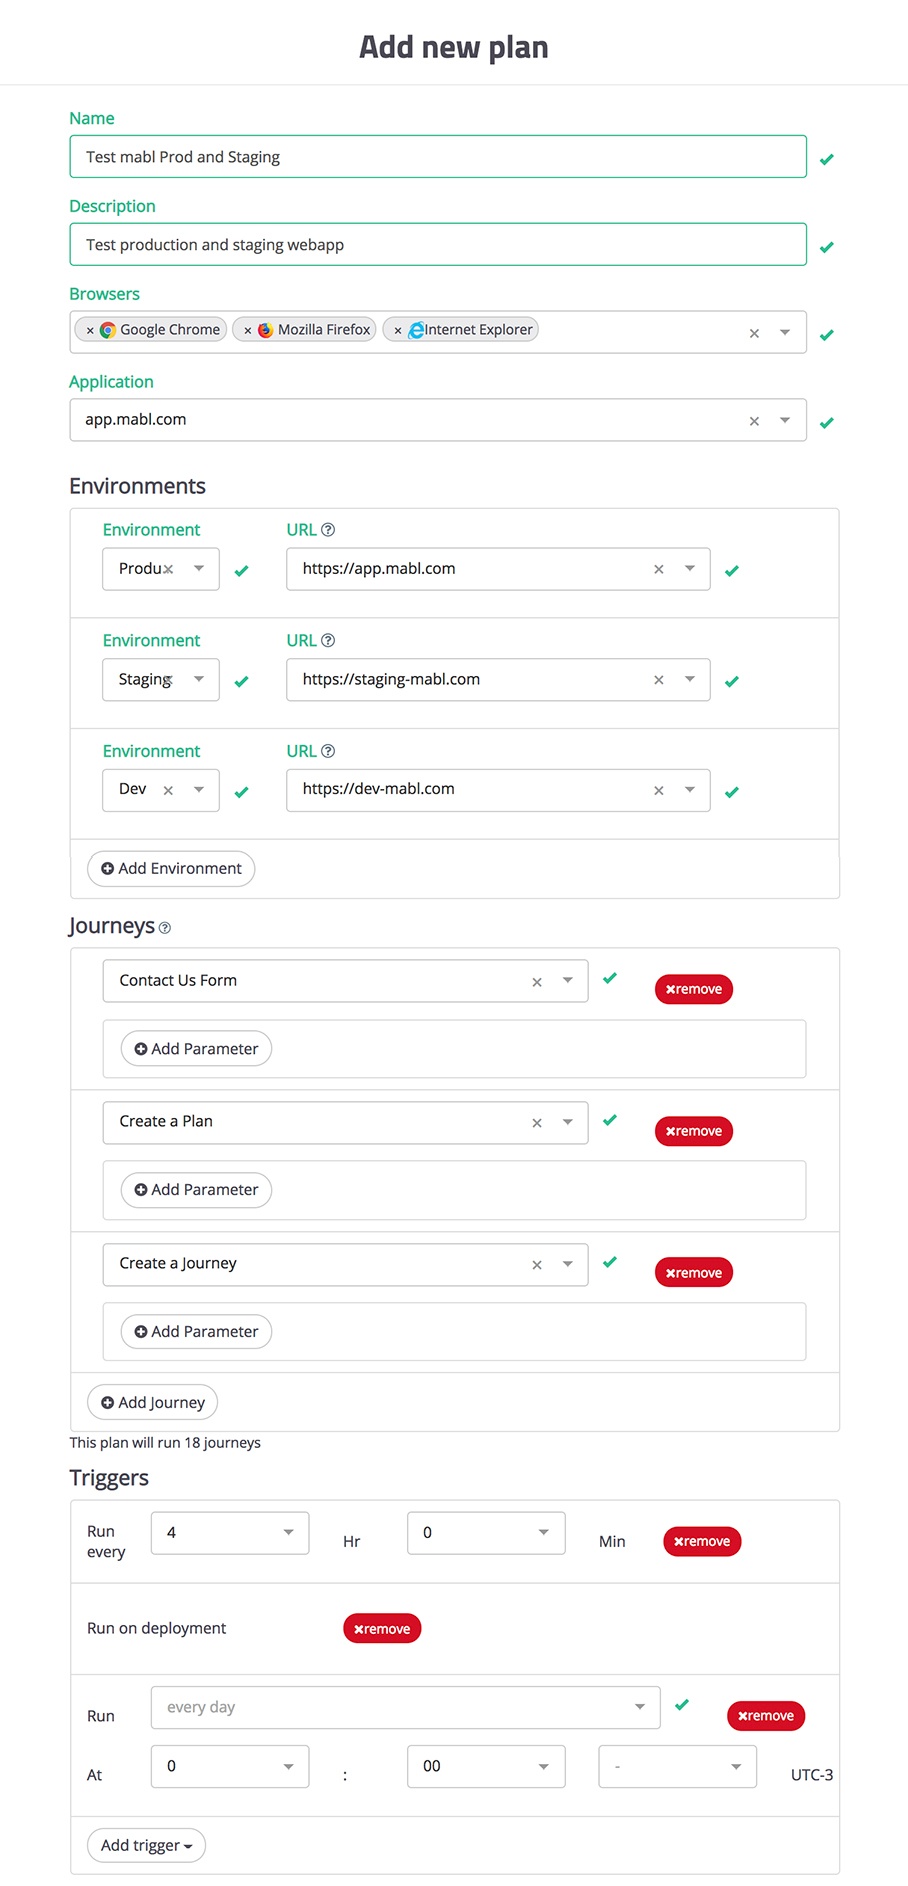
Here's an example plan that contains one journey, set to execute the journey on Chrome, against the target application in Production every 4 hours. As a result of this plan, one test will be executed.
1. Using Plans
A quick and easy thing we can do to spice up our test plan is to simply fill out the "new plan" form (pictured above). To scale this plan up from 1 journey execution, to 18 executions, we will:
a. Add additional browsers to test on (i.e., Firefox, Chrome, IE, Safari coming soon)
b. Add additional target environments (ex: Staging, https://staging-mabl.com; Dev, https://dev-mabl.com )
c. Add more journeys to the plan (In this example, we'll bundle journeys that test the main functionalities of mabl into one plan. Think about what your plan accomplishes on a grander scale. Is it a smoke test? Are you testing all business-critical systems?)
And just like that, we have our new, more robust plan below:
Nice! That was easy. Now let's move on to reusable flows, which will bring us to the topic of configuring journeys.
2. Using Reusable Flows
If you have a common sequence of steps in your journeys, they can be bundled into reusable flows, which can then be inserted into any other journey, too. A journey therefore can be composed of primary (non-reusable) steps and reusable flows.
Remember that Contact Us Form journey (first image) way at the top of this article? We're going to recreate that journey using a reusable flow.
I'll start by navigating to the contact form we're testing. The steps taken to navigate to the form are recorded in grey. These will be recorded as non-reusable steps. Now that I'm at the form, I'll create a new reusable flow by clicking on the reusable flows button in the mabl trainer browser extension:

I'll name the new reusable flow "Contact Us Form", and everything that I record while in this reusable-flow-mode will show up in purple.
Once I complete recording the reusable flow and save my journey, I'll have a journey that contains a "Trained Test" section (non-reusable steps) and a "Contact Us Form" reusable flow section, which looks like this: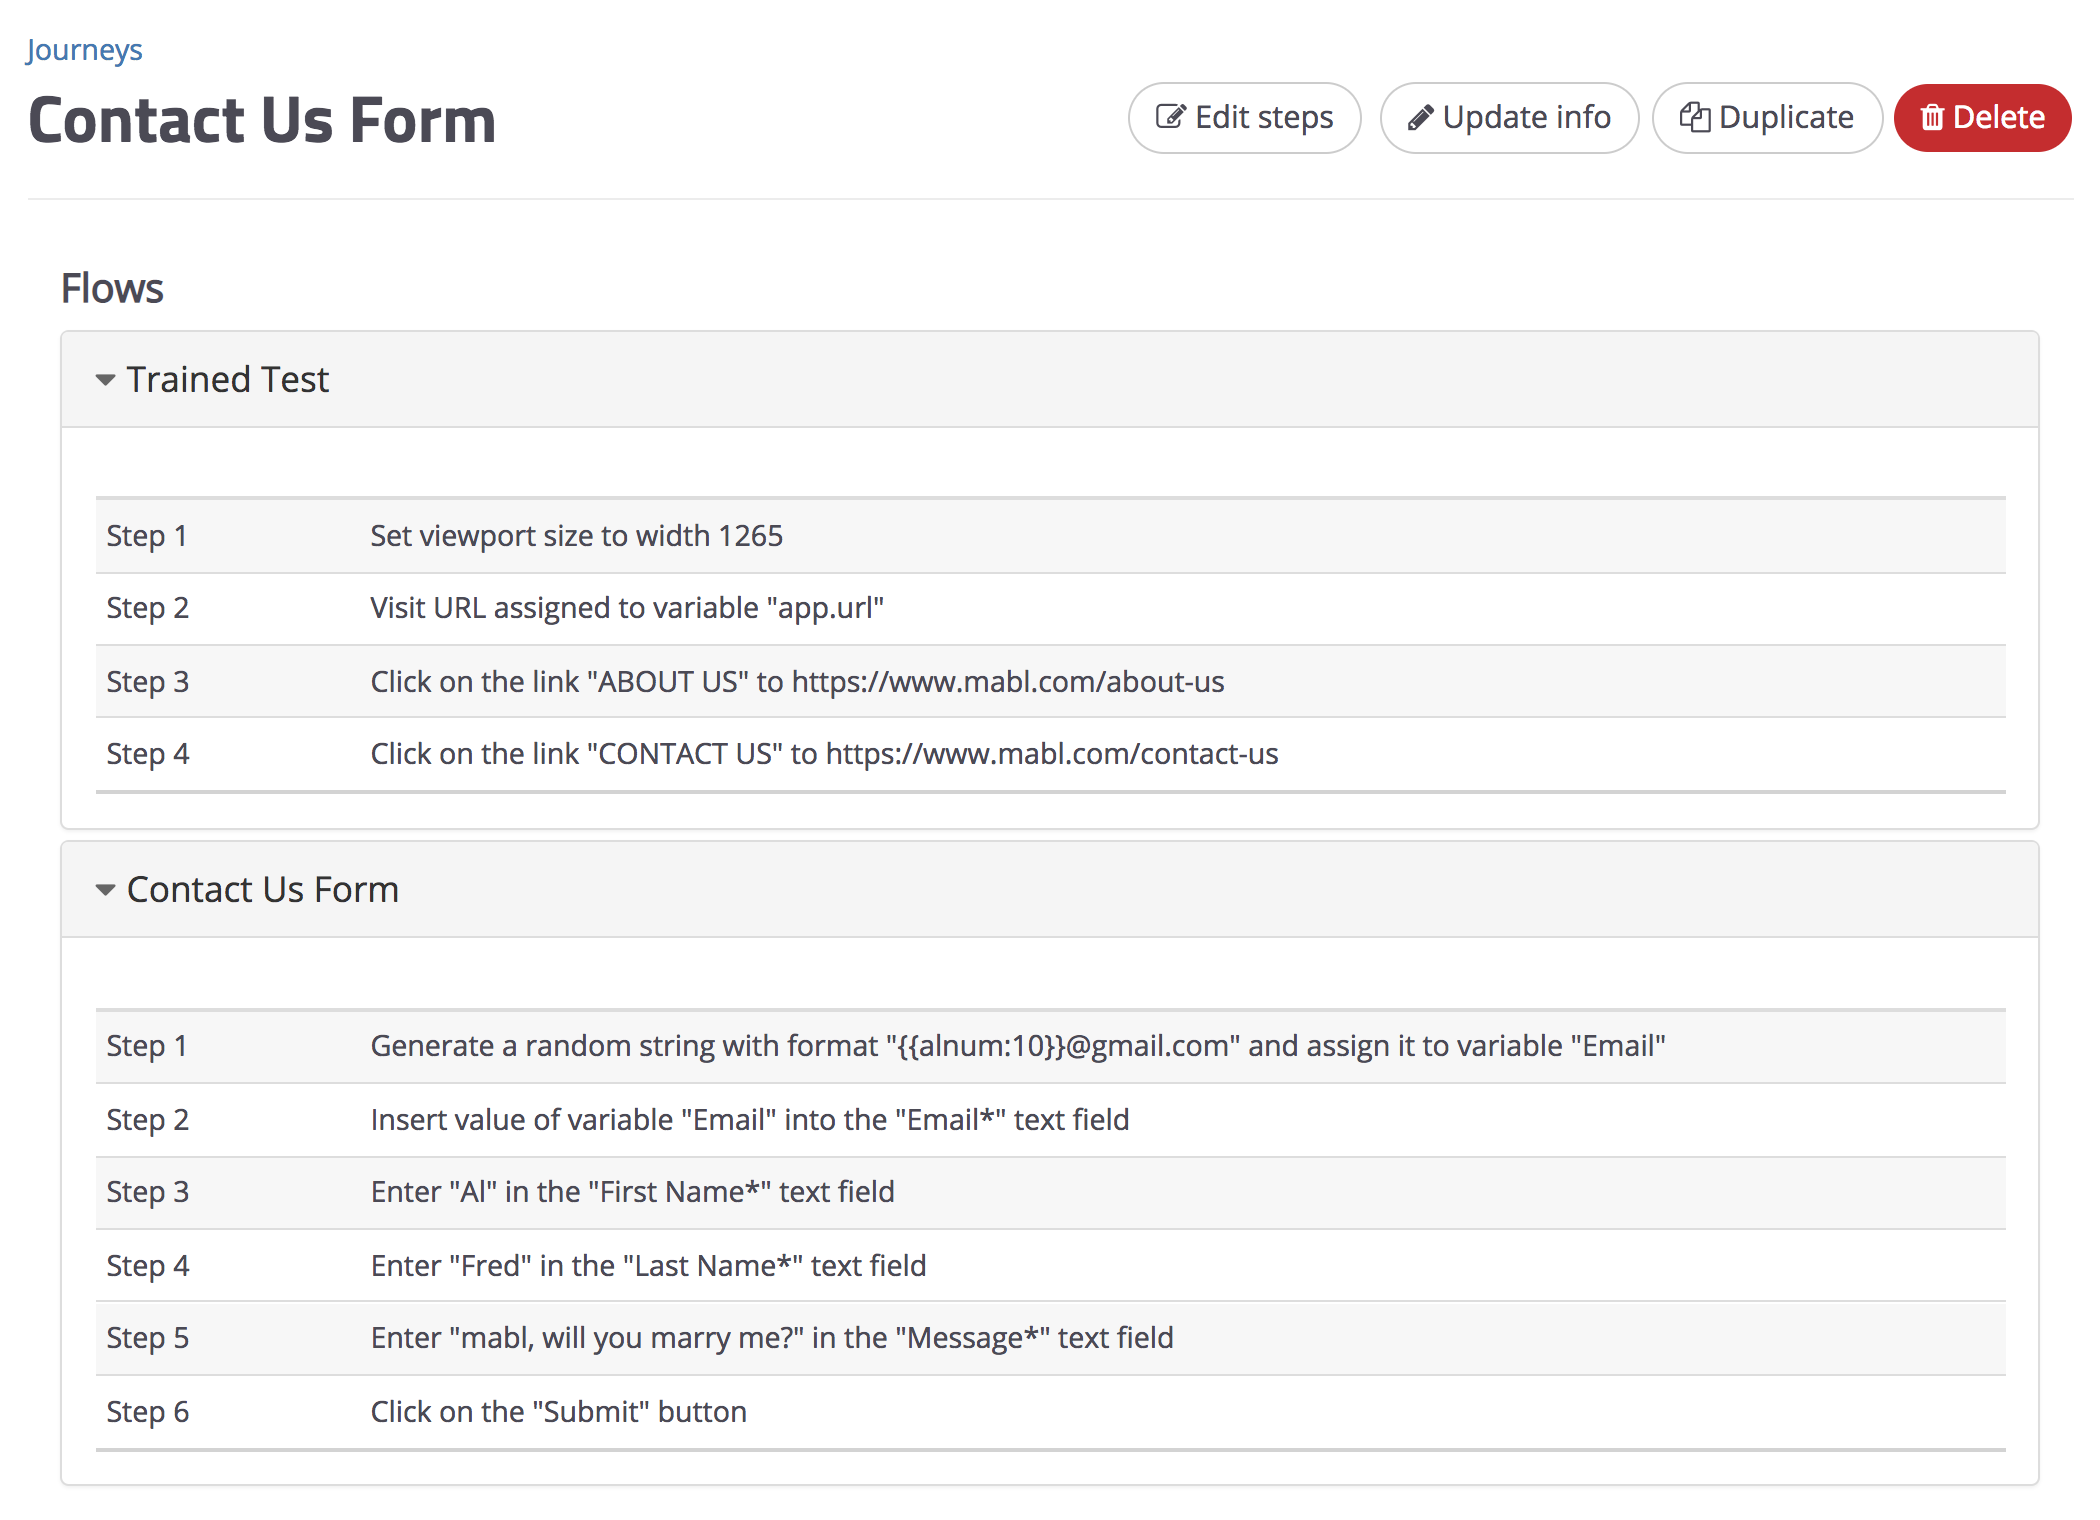
Now if I needed to test a similar form elsewhere, I could import the saved "Contact Us Form" flow while recording the journey: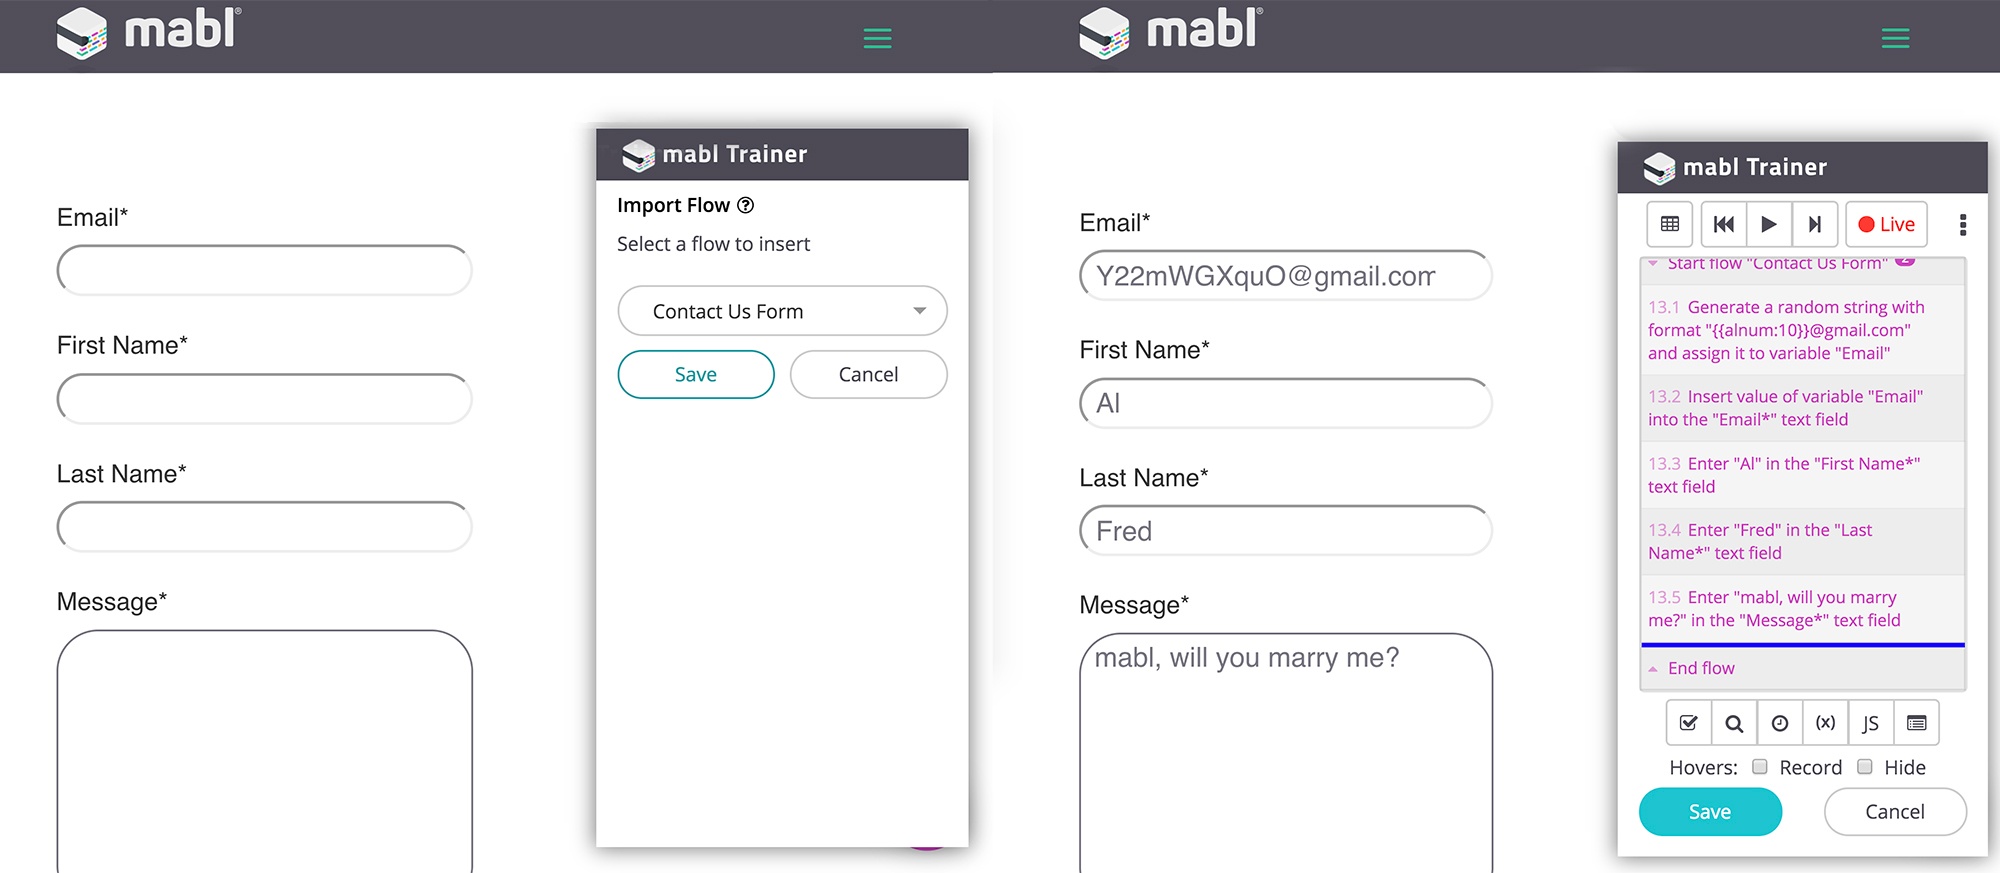
Tada! Reusable flows are an easy way to extend your journeys to make them super flexible, and scales well with changes - if you update a reusable flow, changes will propagate to all journeys containing that flow.
3. Using Data-Driven Testing Tables
There's a number of benefits of making your tests data-driven. Some include:- Reusability: any test script can be written and re-executed hundreds or thousands of times, with different inputs each time
- Versatility: a data-driven test is usually associated with a single test or procedure, but can be used in several test cases
- Efficiency: data-driven tests can generate test scripts with less code
- Separation of logic: data-driven tests allow for the clean distinction of test case logic from the actual test data
- Stronger test coverage: you can continually change the input test data and cover a broad scenario of inputs
And of course, we made creating a Data-Driven Testing with mabl quick and easy. You can use the variables from a data table in any of the following ways:
- in assertions
- as input values
- as URL's to visit
- in template strings to generate other variables
- in custom JavaScript steps
What we need to get started is a Data Table. There's a few ways to do this.
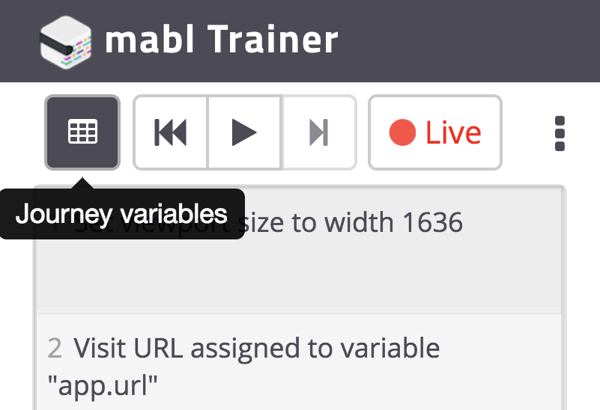
Option one is to create one during the initial recording of the journey. Just click on the Journey Variables button in the top left of the trainer. Here, you can set the Default values (which will be the first permutation of your journey), and you can add the rest of the permutations later in the Data Table configuration view (shown below).
Option two is to create a Data Table in the configuration panel of the mabl dashboard:
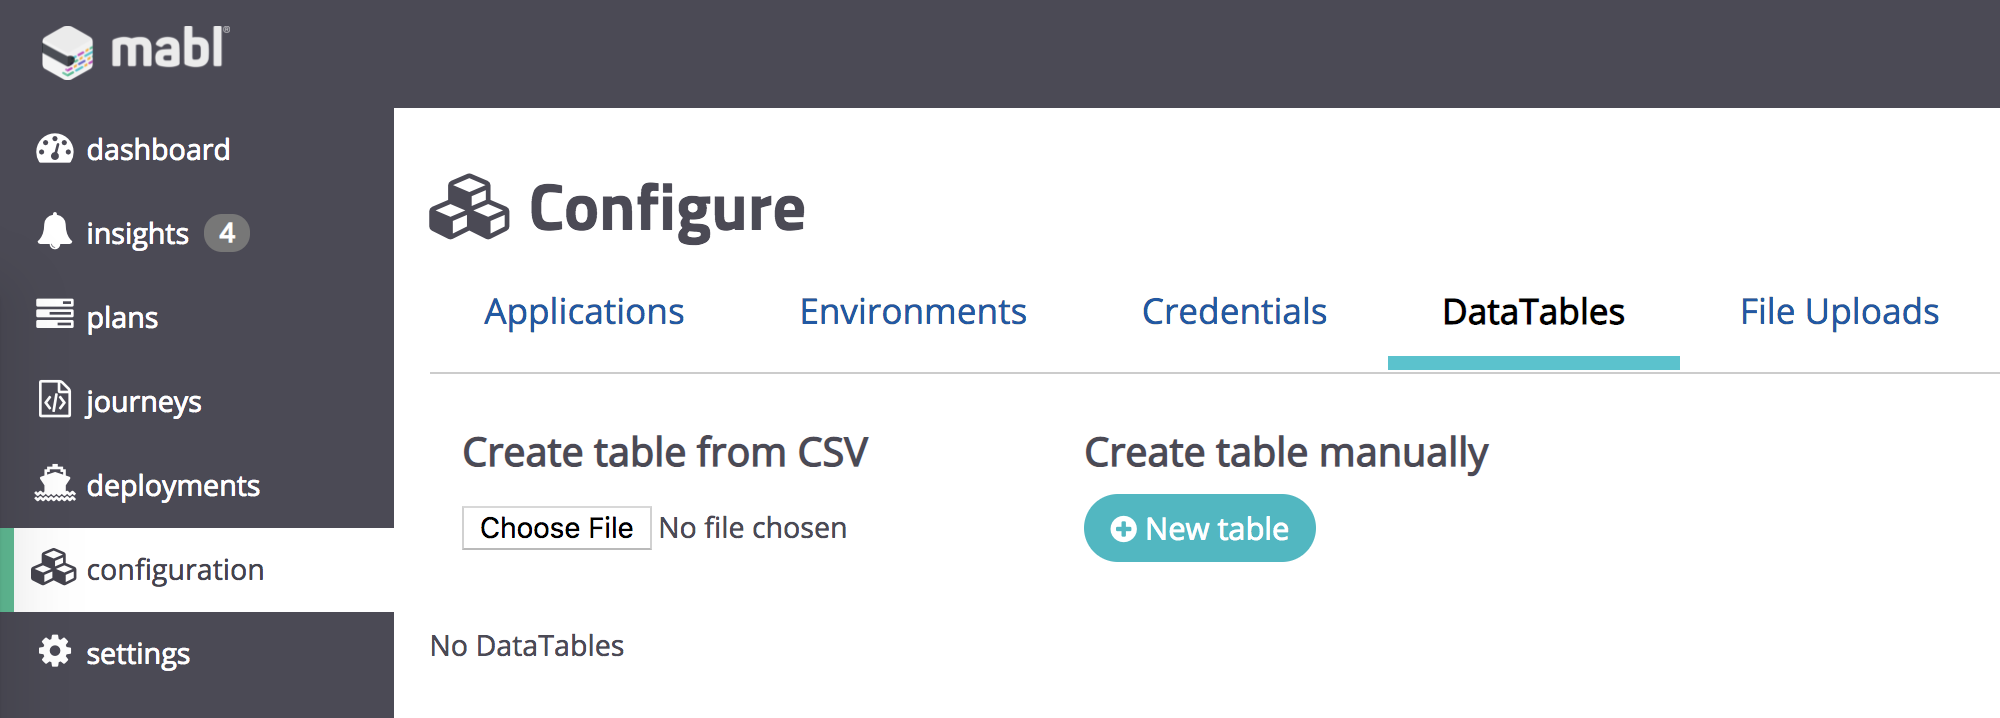
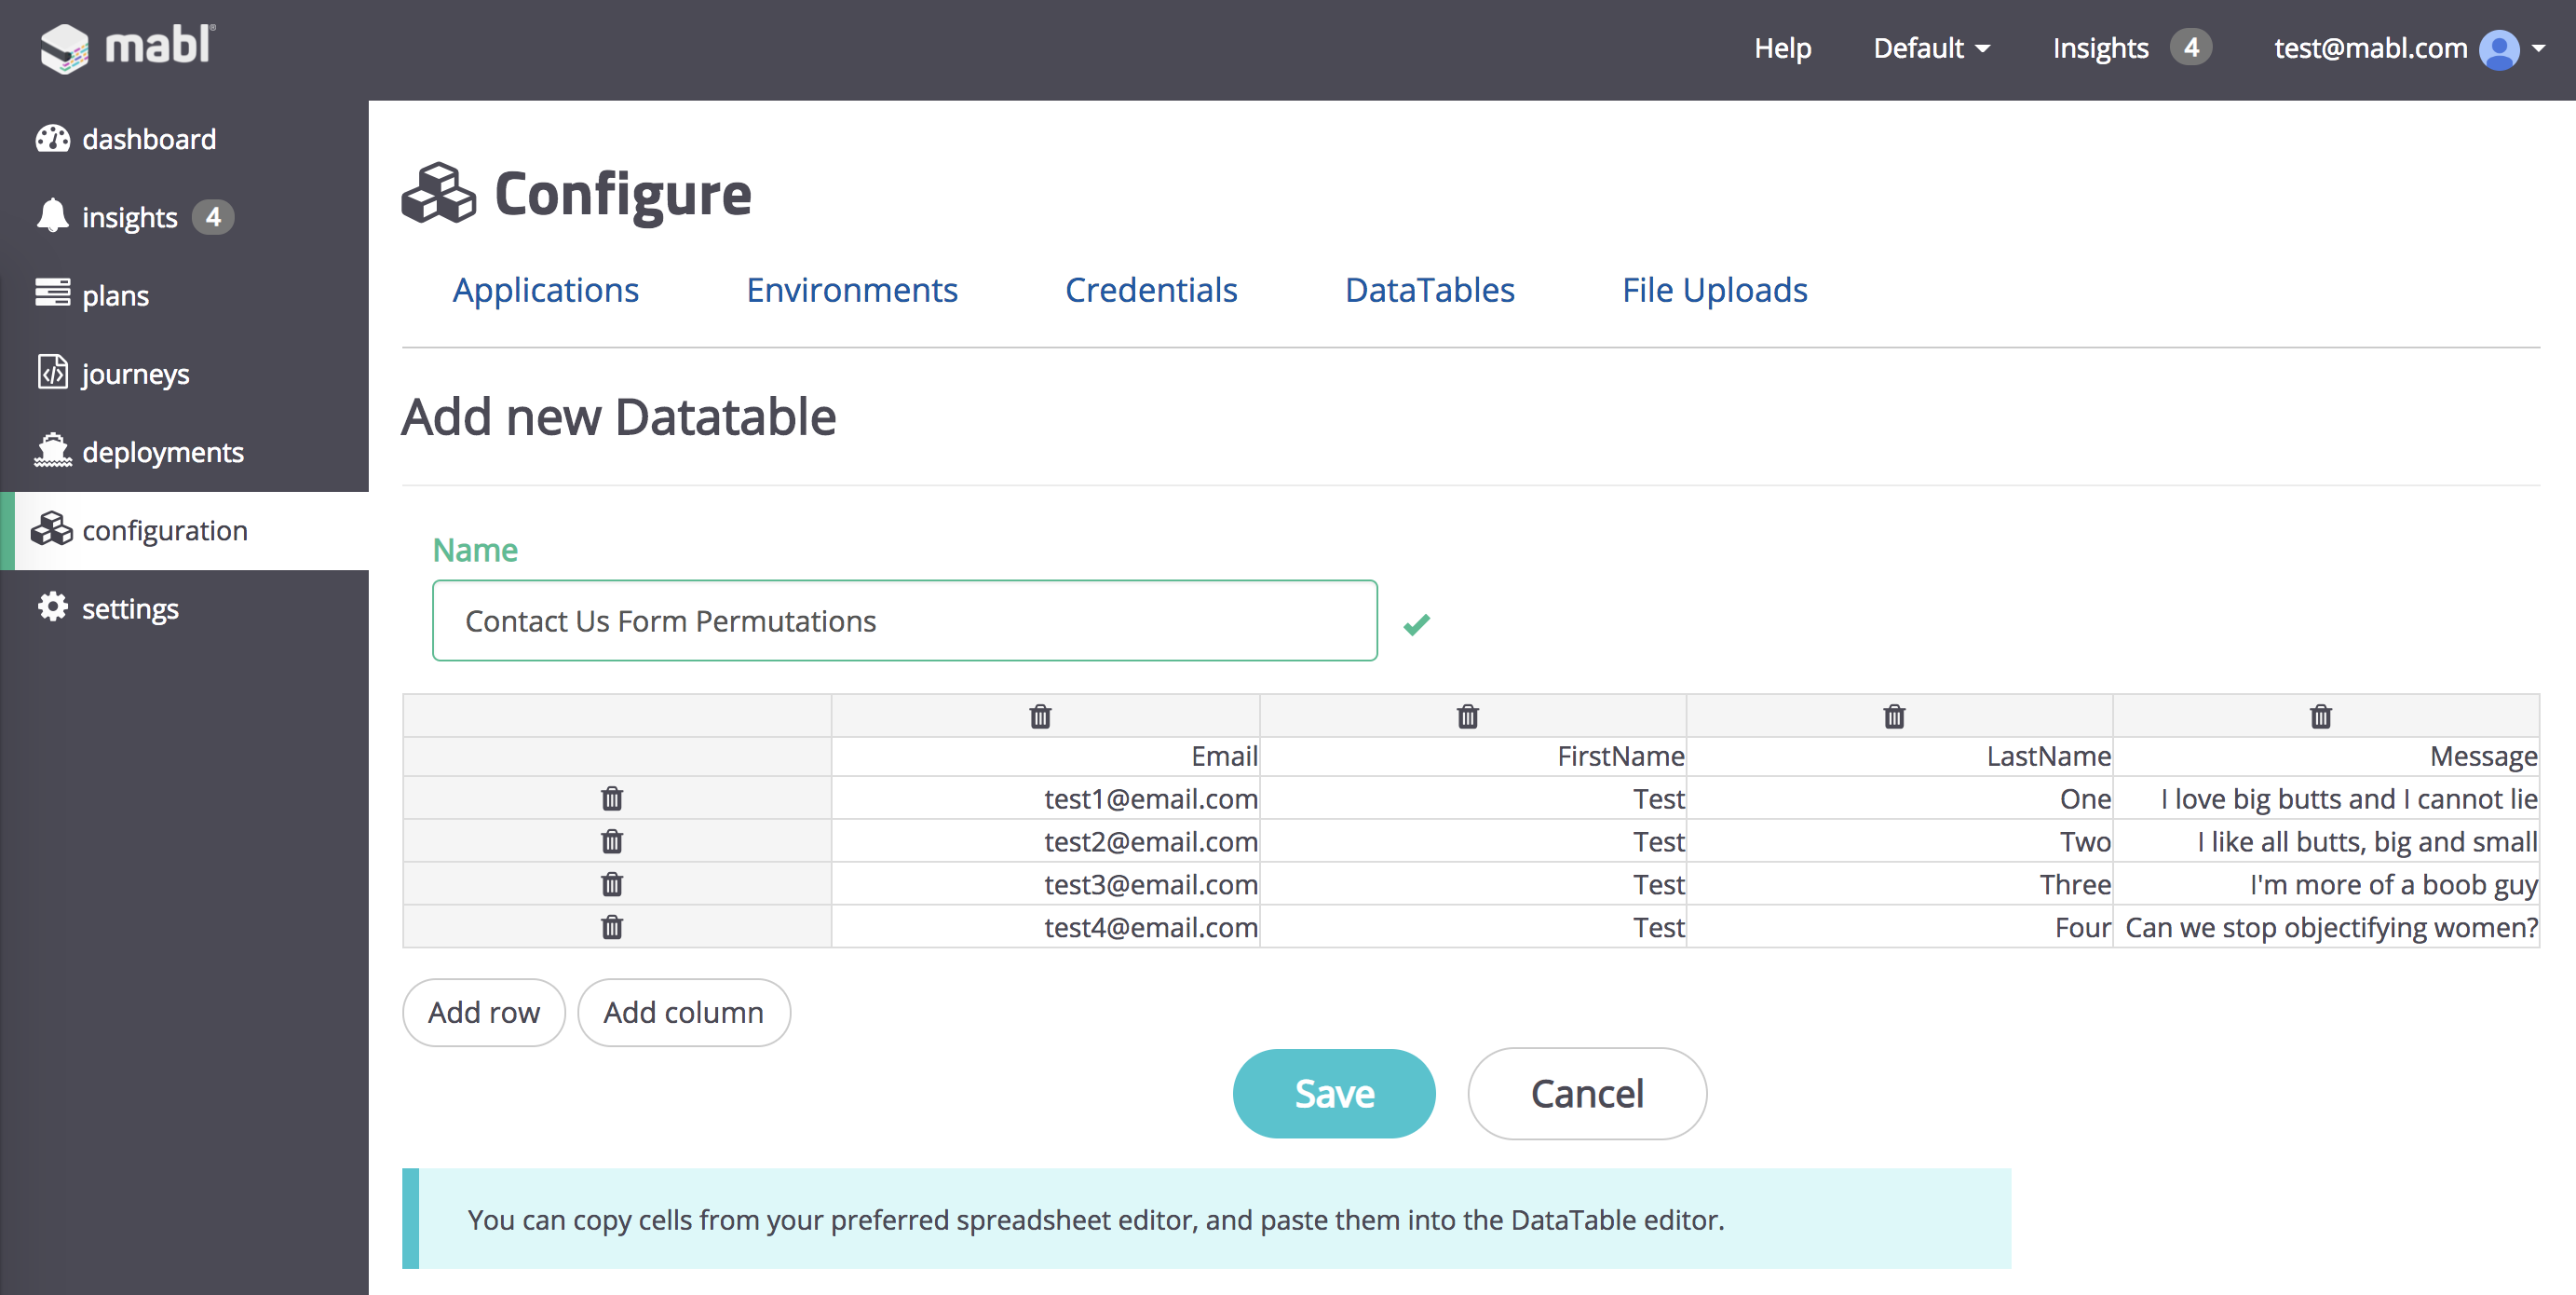
You can manually type the values into the table, copy and paste from a spreadsheet, or upload a CSV.
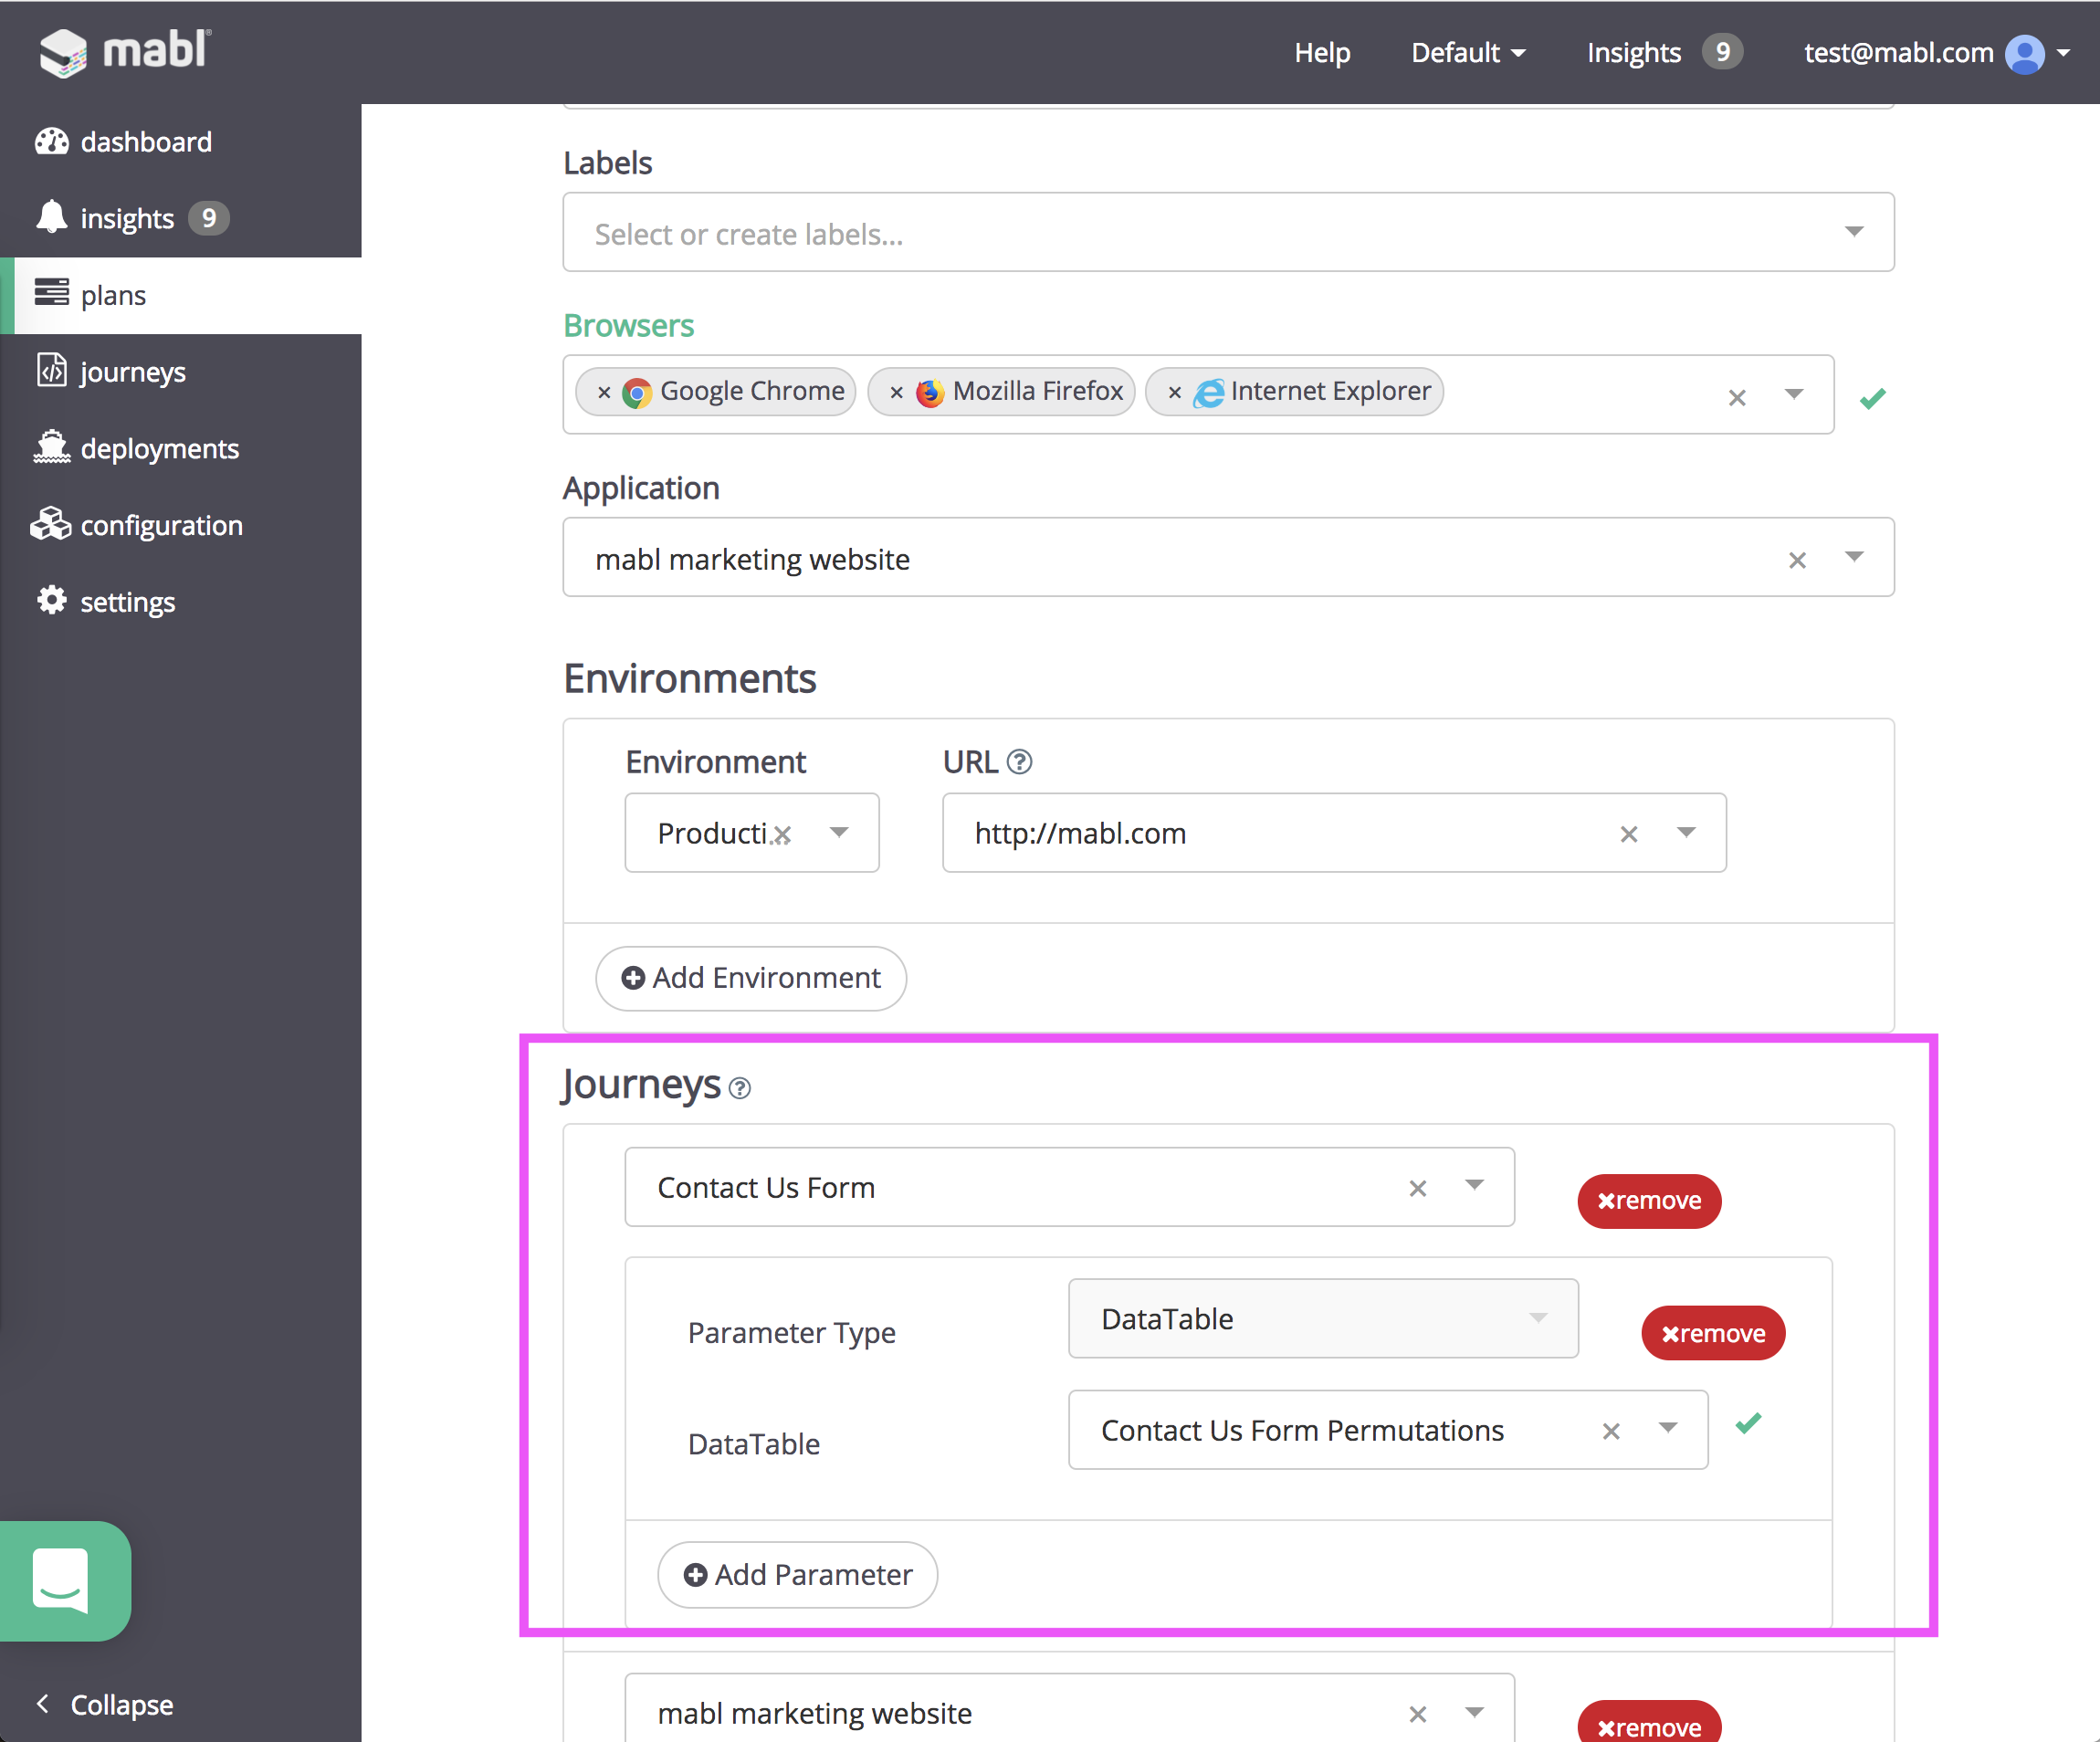
To use this Data Table, specify it in the Plans configuration:
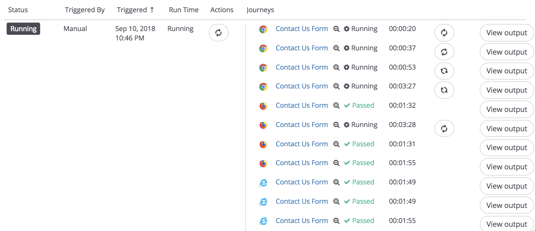
Now when the plan is run, I can see every permutation of the journey kick off:
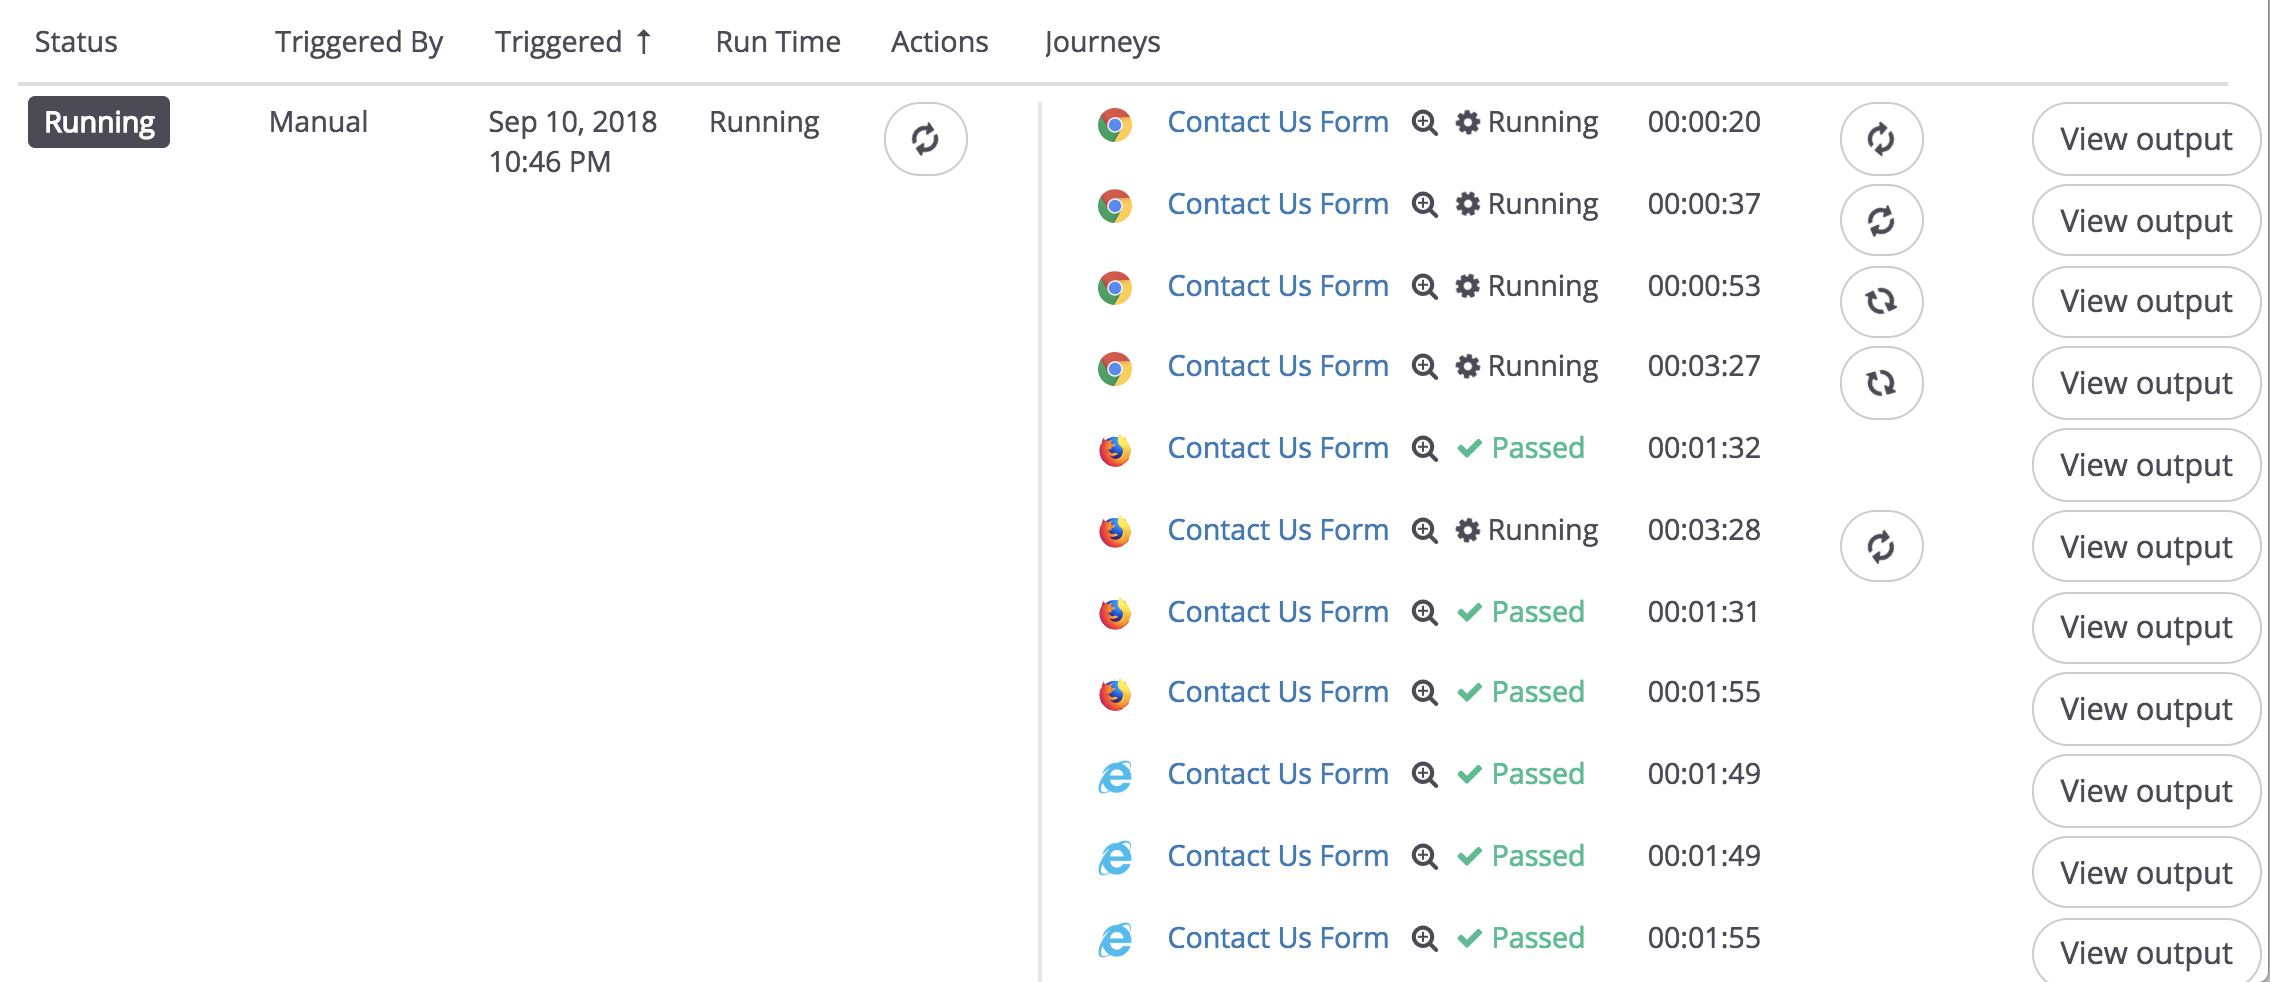
And that's it! You can view the test output to see every action mabl takes along the journey, including inputs used. Data-Driven Testing is a great way to stay organized, and keep your tests versatile.
We've added thousands of rows to our data tables when testing mabl's Data-Driven Testing functionality internally. Go ahead and put us to the test with your own test suite! Try mabl out for free.